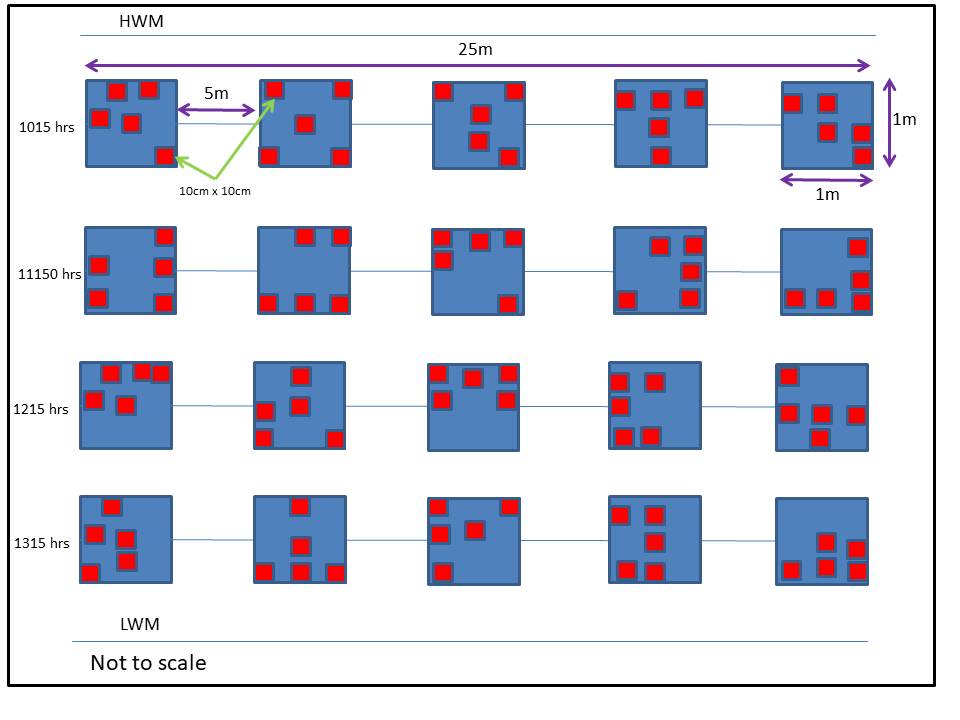
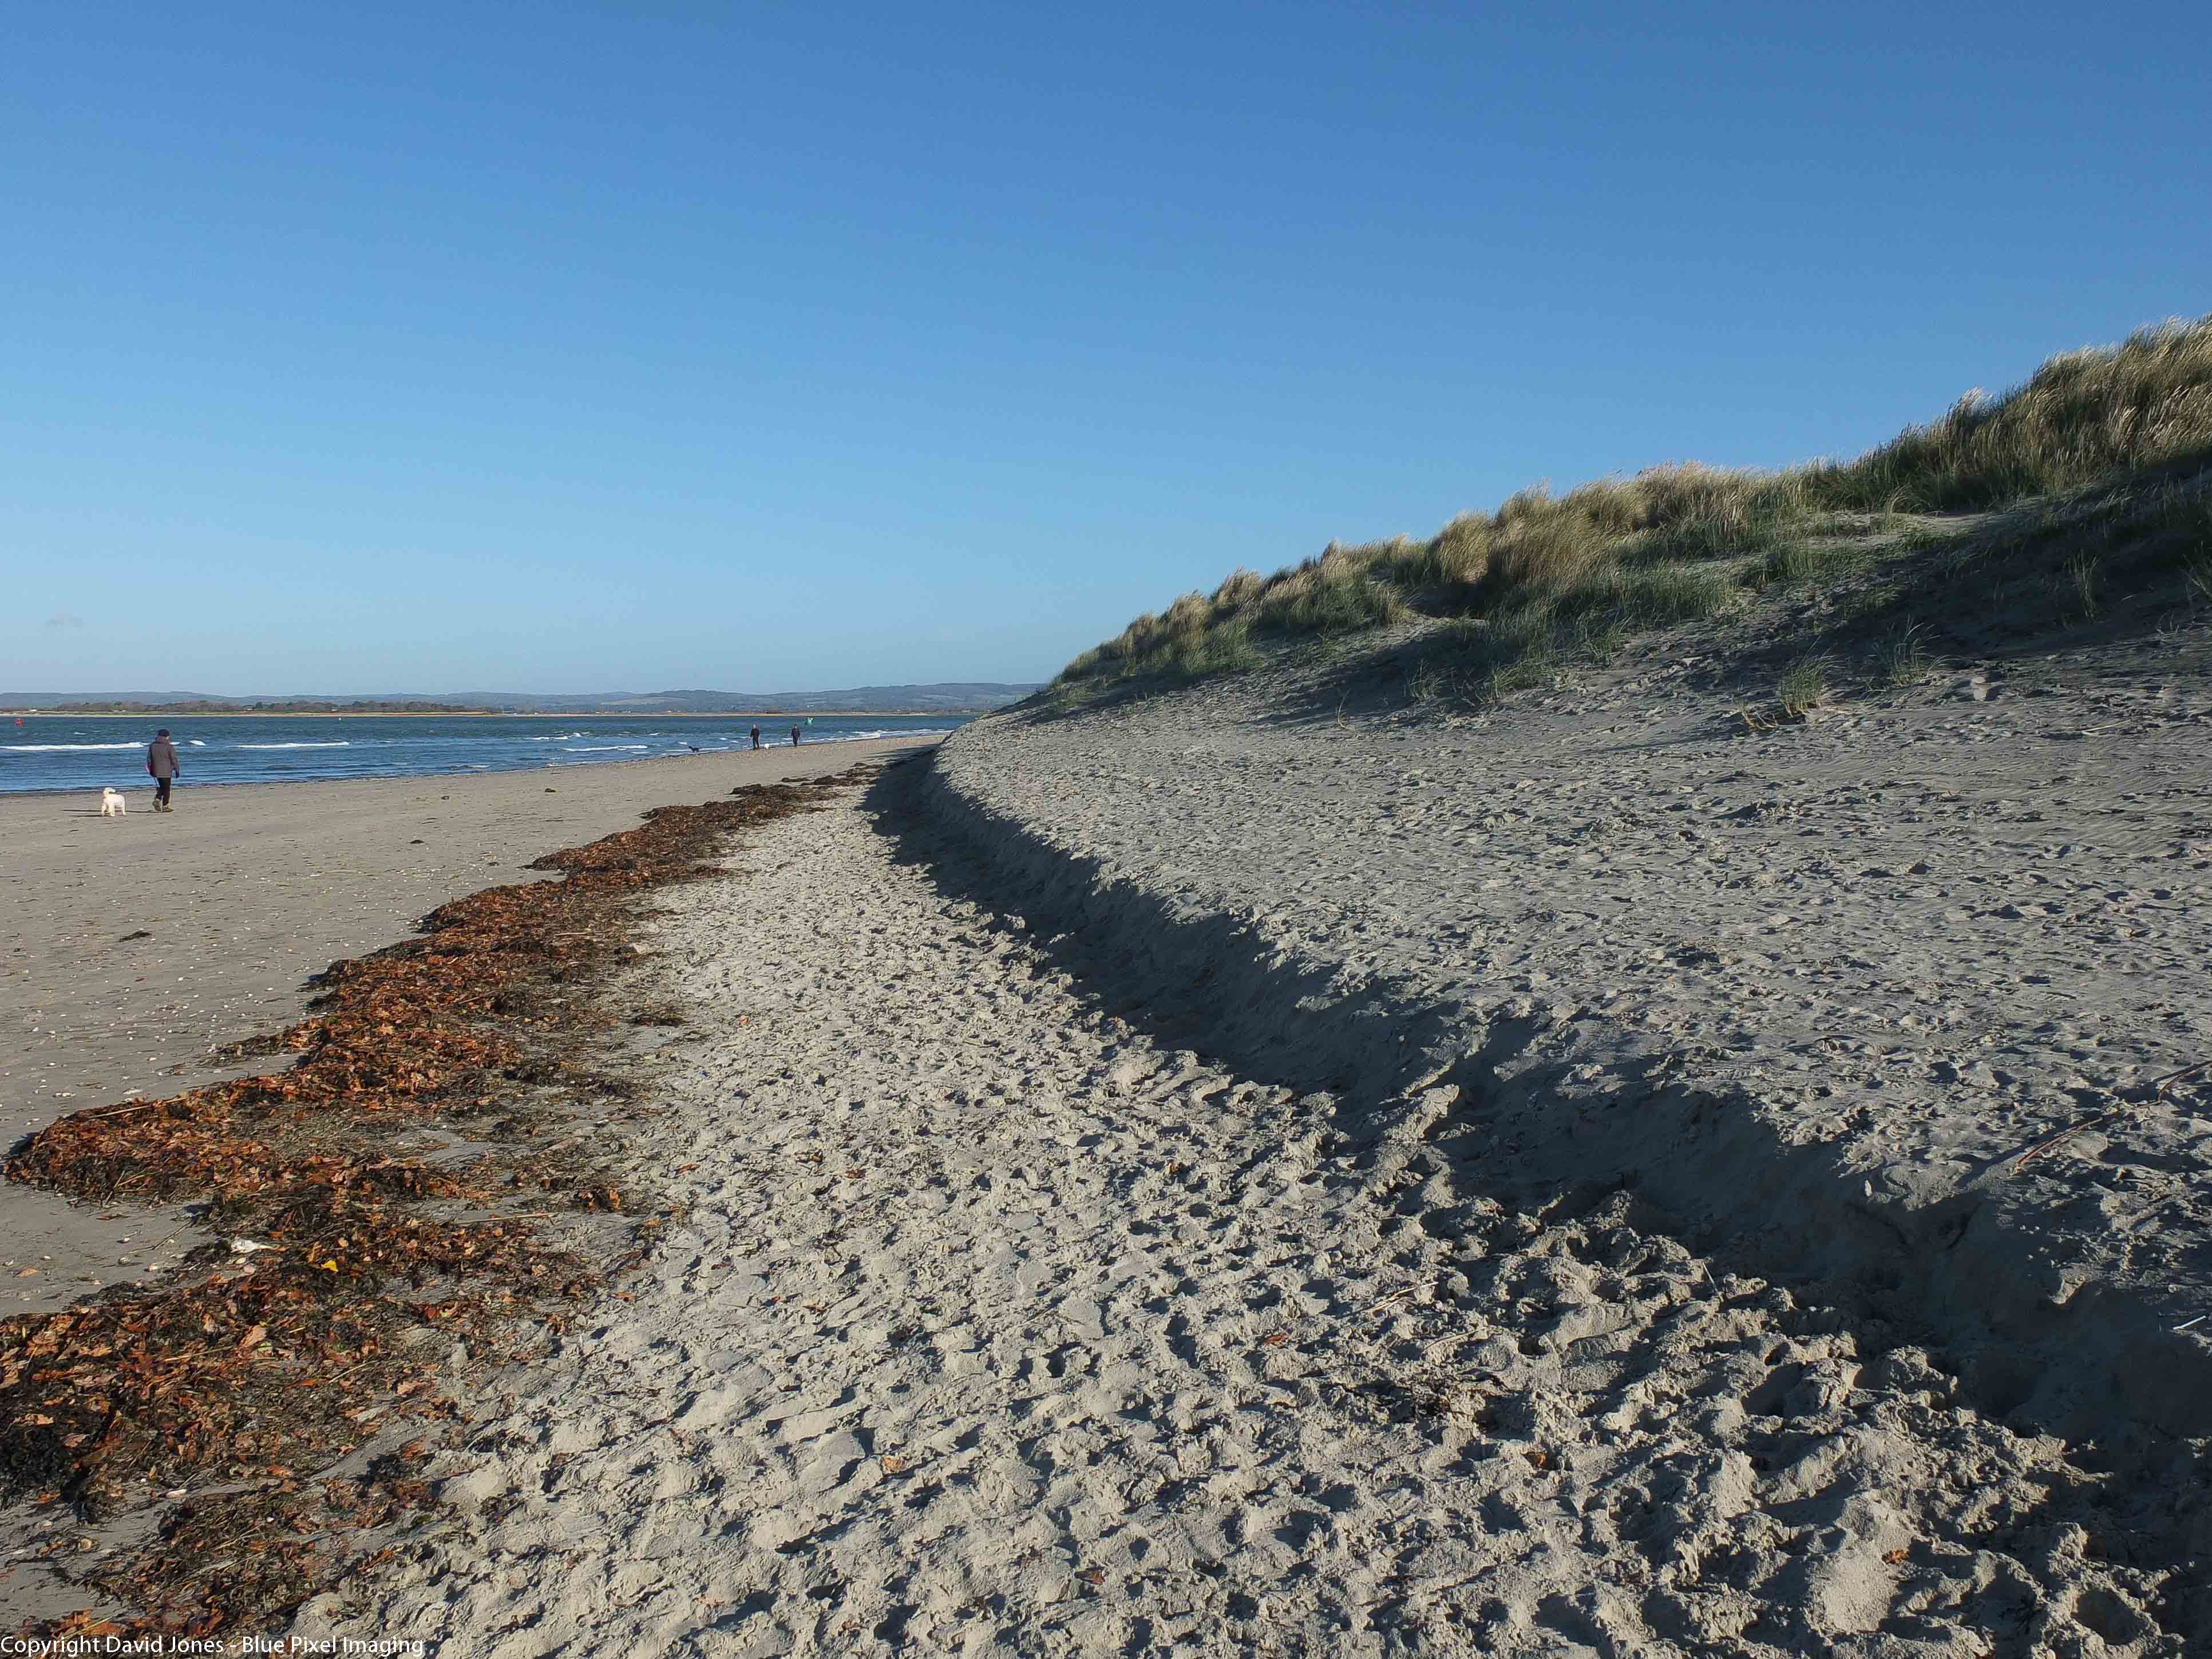
The Intertidal Zone

In order to obtain useful data about how microplastics get to the beach we want to obtain data across the intertidal zone.  At the top of the shoreline is the “Wrack zone”.  This is the highest point of the tide and indicates the highest water mark in the tidal cycle.  This is the first zone to be surveyed.

Follow the Strandlines

Once you have surveyed the wrack zone the tide will have started to go out and you should see successive lines of seaweed.  The next two surveys will be along two of these strandlines.  The final intertidal zone we want to survey is the area just below the last strandline.  The chances are that you may not find much microplastic in this area.  Tha’s fine – it is all useful data.

survey plan

Survey Patterns

For consistency we would like you to mark off five areas along each strandline.  These will be 1 metre square.  Within each of those 1 metre ‘quadrats’ we would like you to take 5 samples from a 10cm square area.  So in total you will take 25 samples from each strandline within your sector.

Ideally the 1 metre quadrats will be 5 m apart, but if you need to move slightly in order to find material that you can dig into that’s fine. Just make a note of it if you can.

You can put all of the plastic material from a single strandline into the same container, but if you can’t get it all in use another one.

microplastic pieces in the sieve

Taking Samples

Before you do anything make sure you have some sea water in your bucket!  Using the 10cm square as a guide, scoop the top 2cm of sediment (NOT 5cm as it states in the video) from within the 10cm square and put it in the bucket.  Do this 5 times at random within the 1 metre quadrat.  Stir the contents to loosen the floating plastic then pour the water and the plastic through the sieve making sure the water goes into the other bucket.  Throw away the remaining sediment.

Remove any visibly obvious organic matter from the sieve and place the remaining material in the metal tray and write on the number of the sector and strandline on the tray.  Don’t forget to write down any notes that might be useful and take a photograph of the area and strandline if you can.

Moving Through the Intertidal Zone

Once you have completed the 5 quadrats in the strandline is it time to move down with the tide and repeat the process.  Hopefully the video below will explain the whole process in more detail.  On the day if you have any questions or issues I will be on the end of a phone.

Taking samples from the beach

Survey Methodology

Health and Safety

Leave a Reply